
Introduction
What are the best Waves plugins for mastering? It’s a good question. Waves Audio plugins are popular and you can often grab them for a great price. However, their catalog is huge, some of the plugins are quite old and there are many overlapping products.
In the past years, I’ve used all Waves plugins. I’ve also put them to test against many similar plugins from other companies. For me, it’s a hit and miss. There are some great ones in the Waves catalog, and others I’m not into. There are also many nice plugins that I still won’t recommend. This is because I feel there are better options available in a similar price range.
My goal with this article is to introduce the must-have Waves mastering plugins. In this review, I’ll also tell you why I like each of these VST plugins so much and give you my tips on using them. My qualifications, short and sweet: I’ve done mastering work for over 10 years now and music production for about 23 years.
Disclosure: I’m affiliated with Waves and I get all of their plugins for free. This also means I’ve had the chance to properly test all of the Waves plugins for real mastering work. I only ever promote products that I like and use myself. Please don’t buy anything unless you’re sure it’s what you need. Check out this post about how to make better buying decisions.
So here is my review of the best Waves plugins for mastering work in 2022, in alphabetical order.
Best Waves Plugins for Mastering in 2022 – My Top Recommendations
Before we move on to the detailed reviews, here is the full list for your convenience.
These are the best Waves plugins for mastering:
- Waves Abbey Road TG Mastering Chain
- Waves Abbey Road Vinyl
- Waves Center
- Waves H-Comp Hybrid Compressor
- Waves Infected Mushroom Pusher
- Waves L3-16 Multimaximizer
- Waves Linear Phase Multiband Compressor
- Waves RS56 Passive EQ
- Waves S1 Stereo Imager
- Waves SSL G-Master Buss Compressor
- Waves Submarine
- Waves Trans-X
- Waves Vitamin Sonic Enhancer
Waves Abbey Road TG Mastering Chain
The Waves Abbey Road TG Mastering Chain models the vintage EMI TG12410 Transfer Console used in all of the Abbey Road mastering suites ever since the ’70s. It was used on many legendary albums, such as Pink Floyd’s The Dark Side of the Moon, Nirvana’s In Utero, Radiohead’s OK Computer and Ed Sheeran’s “+” to name a few.
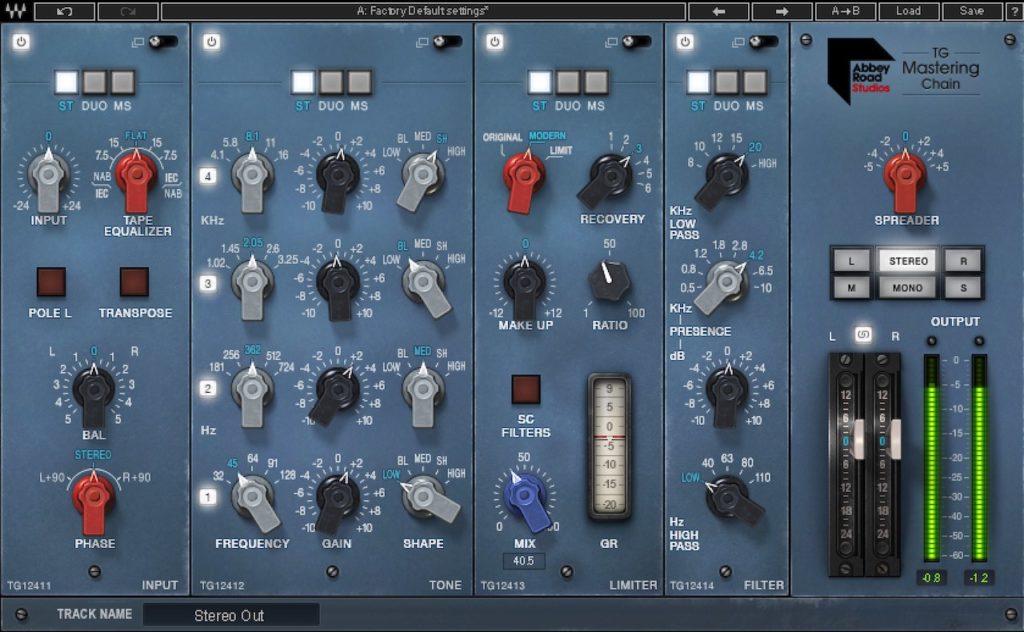
The plugin has several different sections including filters, EQ, compression and stereo widening. The sections can be switched on/off and you can change the order of the processing.
There is a small learning curve involved with the Abbey Road TG Mastering Chain. Especially if you’re not used to operating older analog equipment (or plugins modeled of them). The nature of some of the controls (particularly on the compressor) is not instantly obvious. The silver lining is that this plugin forces you to listen carefully and make decisions based on what you are hearing. That is a good thing in my books.
The reason I included this plugin here is simply because I love how it sounds. I am especially fond of the compressor. It’s very good for adding thickness and glue or creating subtle pumping movement. It has fantastic Mid-Side and sidechaining options, which make it a lot more versatile than it may seem at the first glance. It is the best Waves compressor for mastering. The stereo widener on the TG Mastering Chain can also sound amazing with the right material. The EQ is good too – vibey and quick to get good results with.
Waves Abbey Road TG Mastering Chain Tips
- You can expand the modules to get more functionality. Click the little switch on the top right corner of each module. Easy to miss!
- Spend some time getting to know the different modes of the compressor. Try it with different kinds of material. Also works great on individual tracks or group buses.
- The plugin sounds quite rich and it’s easy to get carried away and do too much. Look out for that, because mastering is all about subtle enhancements!
- Work with the output gain so that the output of the plugin stays as loud as the bypassed signal. This will make it much easier for you to compare before/after results.
Link: Waves Abbey Road TG Mastering Chain
Waves Abbey Road Vinyl
I was always hoping for a plugin like this to show up. Yet I was also doubtful of whether the sound characteristics of a vinyl record could be replicated in a plugin. So I was both curious and skeptical when trying the Waves Abbey Road Vinyl for the first time.
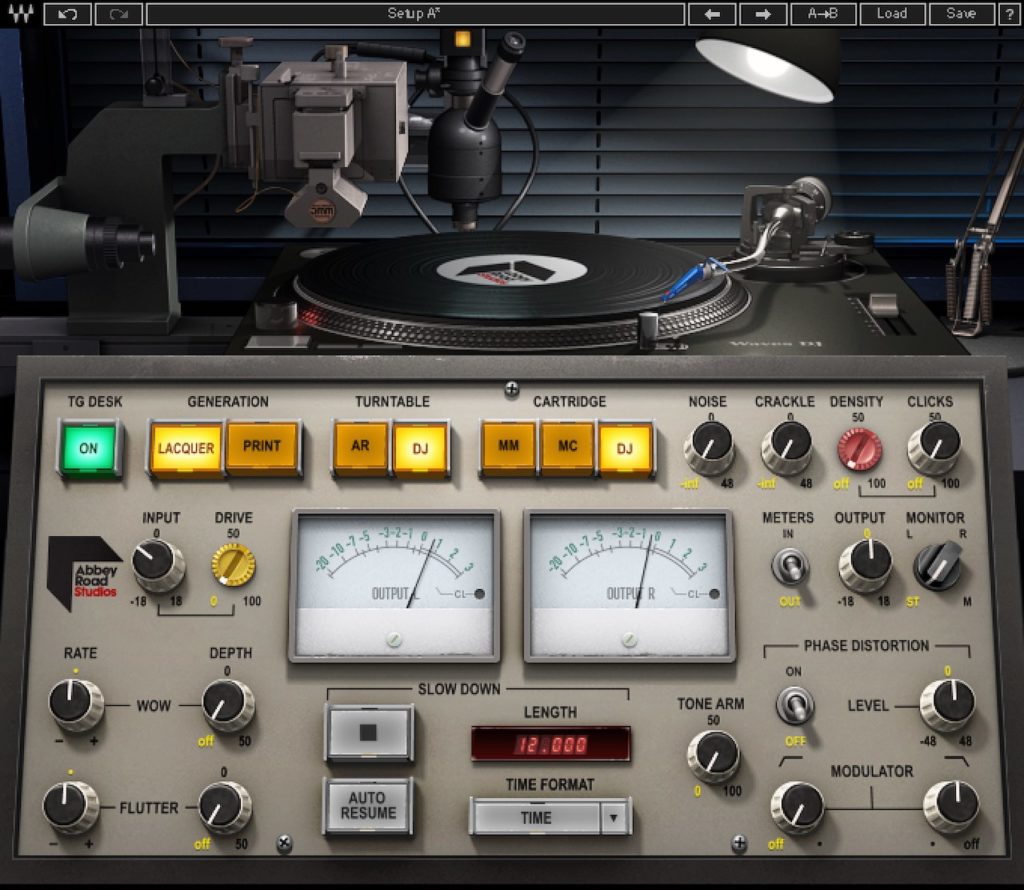
It didn’t take long for me to notice that this plugin is no joke. It sounds very good and does give you the characteristic vinyl vibe. I have Technics SL1200 turntables with Ortofon Concorde needles which Waves seem to have modeled in the “DJ” mode. I can recognize the sound! The plugin has many different options for configuring the sound exactly as you like it. Waves have gone to great lengths with the modeling, as it should be of course.
Waves Abbey Road Vinyl Tips
- If you want to go crazy with effects, feel free. But to get nice character for mastering without adding any artifacts, turn off the following settings:
- Noise
- Crackle
- Clicks
- Phase distortion
- Wow depth
- Flutter depth.
- Then set the input gain so that the VU meter needle doesn’t go much past zero and use the drive setting to get the right amount of character.
Link: Waves Abbey Road Vinyl
Waves Center
If you’re not used to mid-side programming, Waves Center gives you an easy and effective way to approach it.

Center allows you to take control of your stereo image in some interesting ways. The two big faders allow you to set the relation between “Center” (or mid) and “Sides” (side) content. The “Low” and “High” knobs balance the low and high-frequency content respectively between the middle and sides of the mix. The “Punch” dial then focuses the transient content of the material more to the middle, or the sides.
It’s a deceptively simple set of controls. Center packs a lot of power to shape the impact of the material. If you are already well versed and equipped with mid-side EQ and compression, you won’t need this plugin. But if you’re looking for an easy way to control the stereo image, Center is a great option. It is also a great companion plugin to the S1 Stereo Imager, introduced later in this article.
Waves Center Tips
- Center is a subtle plugin. When looking for the right settings, turn down the “Center” and “Sides” faders in turns and tweak the controls at the top. That way it will be much easier to hear what is going on.
- For emphasizing punch, try focusing “Low” and “Punch” towards the center.
- For simple widening or narrowing of the stereo image, all you need to do is to push the “Sides” fader up or down.
Link: Waves Center
Waves H-Comp Hybrid Compressor
If you are looking for a master bus compressor that gives you thickness, movement, and character, you could do a lot worse than the Waves H-Comp Hybrid Compressor. Year in and year out, the Waves H-Series plugins have been among my favorites.
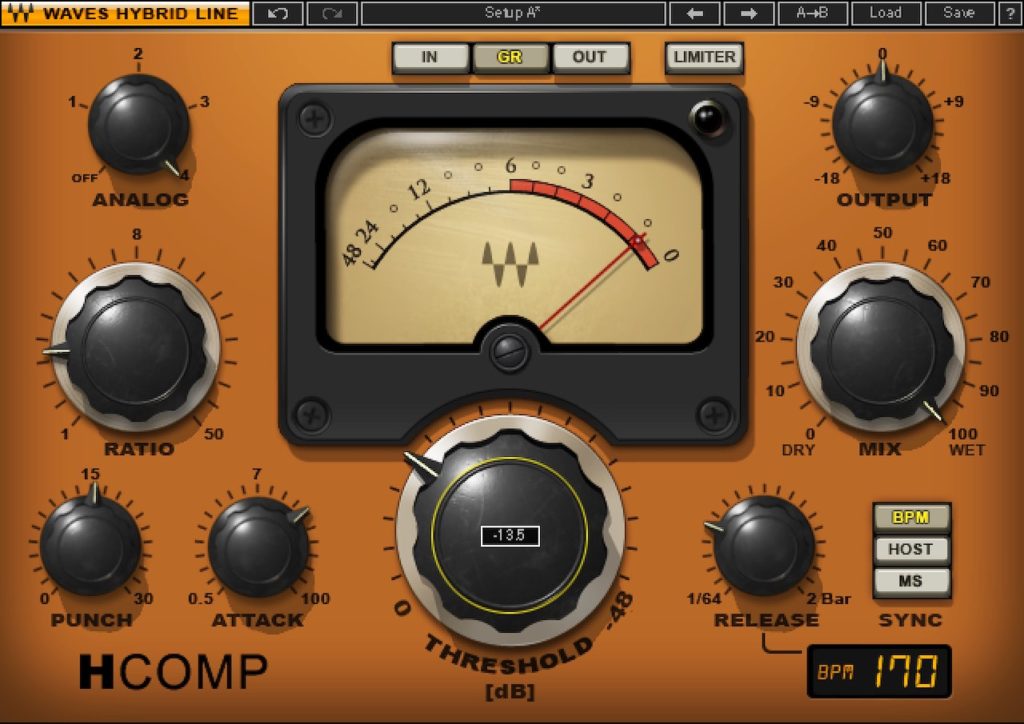
The H-Comp is not a typical clean mastering compressor. It is not primarily designed to be a mastering compressor at all. But it’s plenty precise enough to be used as one. If you think your mix is sounding a bit digital and flat, then the H-Comp might be just the right tool for the job.
It’s a compressor with some mojo and I typically like to use it in a situation where I want to hit the master a little bit harder. It sounds very nice and I like that the controls are nice, big and clearly laid out.
Waves H-Comp Hybrid Compressor Tips
- Use the BPM or host sync functions to sync the release time to your mix for super tight movement.
- Experiment with the four analog modes. They all sound different. For the type of material I often work with (fast-paced drum & bass music), I many times like number 4.
- Switching the analog character mode off gives you a cleaner sound that still has an attitude. I use this setting often as well.
- Try dialing in a short attack time, hit the compressor hard and then bring back the transients with the punch control. Aggressive and abusive, but can sound very nice in the right situation. And you can always dial it back with the mix knob.
Link: Waves H-Comp Hybrid Compressor
Waves Infected Mushroom Pusher
I am not usually a fan of ambiguous all-in-one “magic” plugins that attempt to accommodate many complex processes into a super-simple interface. But in all fairness I gave the Waves Infected Mushroom Pusher a good spin. And yes – I was surprised by how it performed. Well enough to make it into this list, and that’s pretty good indeed.
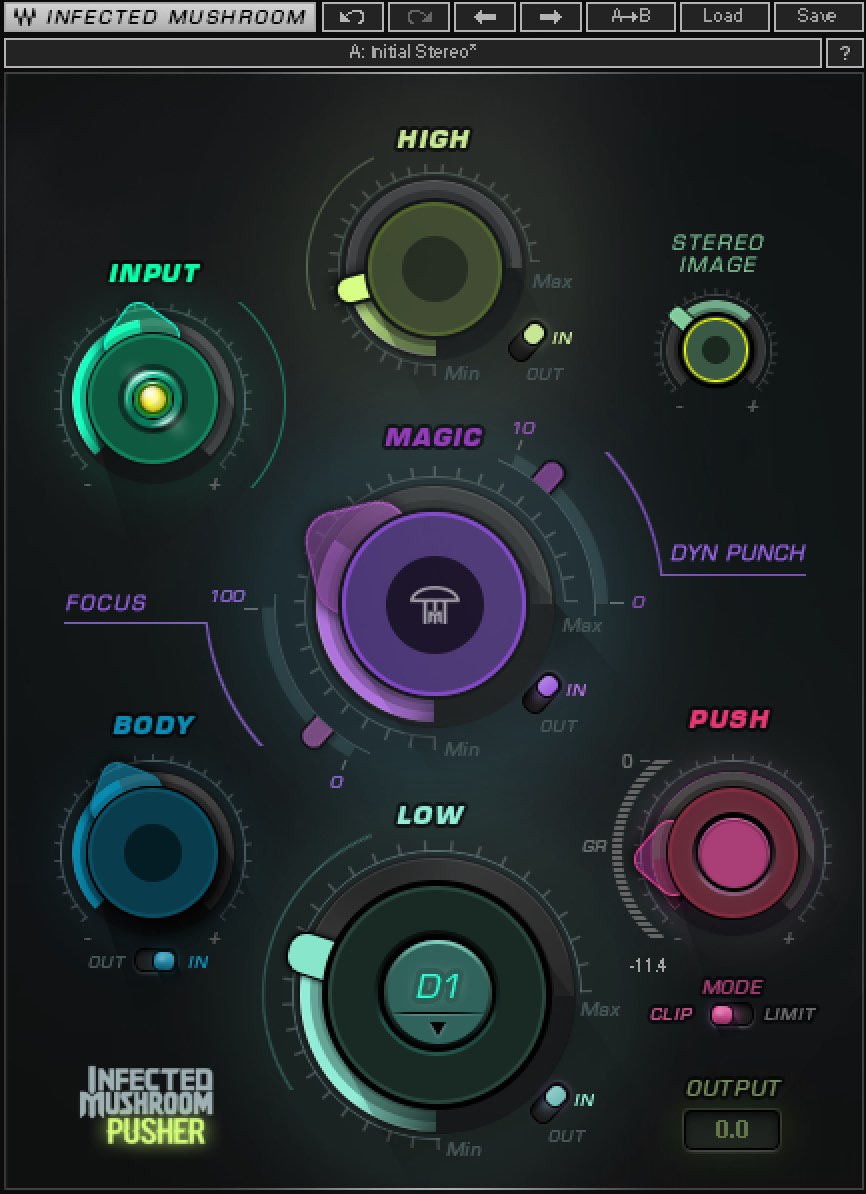
The plugin has many controls for enhancing the dynamic and harmonic properties of the material. It’s well designed and calibrated for subtle mastering type work. And you can get some very good results with it.
While I prefer to use specialized tools that offer me more control, I won’t hesitate to recommend this plugin for someone who is maybe fairly new to mastering and wants an easier way to enhance their masters. For someone like that, this is the best Waves plugin for mastering.
Waves Infected Mushroom Pusher Tips
- Pay attention to the small LED at the center of the Input section. Adjust the Input so that this LED lights up green or yellow.
- The low-end boost sounds very good! But do make sure you are not overdoing it. It can be difficult to hear reliably what is happening at the lowest end of the spectrum. Use a spectrum analyzer to monitor how much louder your sub-bass gets.
Link: Waves Infected Mushroom Pusher
Waves L3-16 Multimaximizer
Let’s make one thing clear: I think there are better options out there for transparent mastering limiters currently than what Waves have to offer. The Waves limiters are quite old and limiter technology has come a long way in recent years.
However, I still wanted to include one here: the Waves L3-16 Multimaximizer. It’s pretty unique and you can do some very interesting shaping with it. And if you wanted to use it as a traditional limiter, it can still sound fairly transparent (but only with moderate gain reduction). If you wanted to pick one limiter from the Waves range, this is what I would recommend.
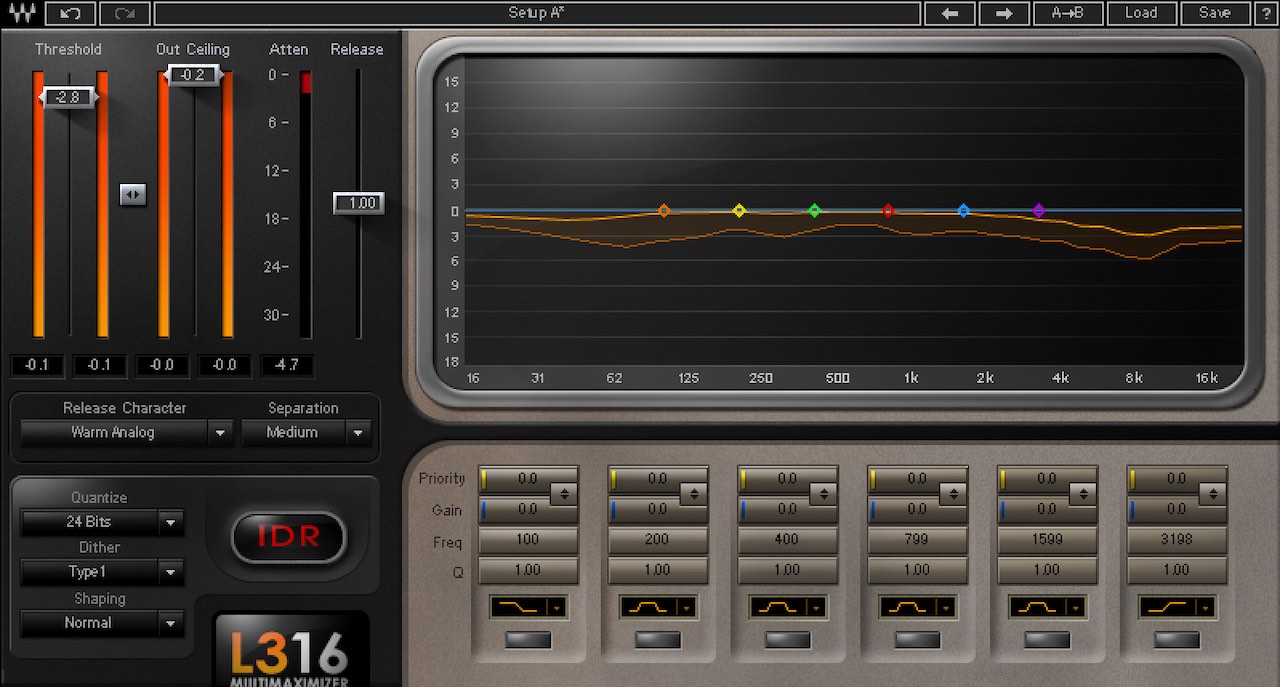
The L3-16 is a 16 band peak limiter and a paragraphic linear phase mastering EQ. It is the cleanest of the Waves limiters and offers the most control. You can also get some pretty interesting characters out of it by exploring the Release Character menu and the priority controls.
Waves L3-16 Multimaximizer Tips
- The Priority -control allows you to control the amount of limiting applied to each band. Higher priority leads to less limiting (in relation to other bands). This is a ticket to some quite interesting results. Try setting a high shelf with low priority and a boost on the EQ. It won’t sound transparent, but you might like what it does! This can work wonders on a drum bus, too.
- Explore the “Release Character” menu. You can get many different characters out of the L3-16 this way. Different characters suit different material.
- The linear phase EQ is pre-limiter and works exactly as you would expect. The more you boost, the more limiting will occur in that band.
Link: Waves L3-16 Multimaximizer
Waves Linear Phase Multiband Compressor
There are lots of great multiband compressors out there these days. But the good old Waves Linear Phase Multiband Compressor still more than holds its own in the competition. It is also very cost-effective (wait for the discount). Sure, it could use a facelift. But don’t let that deceive you.
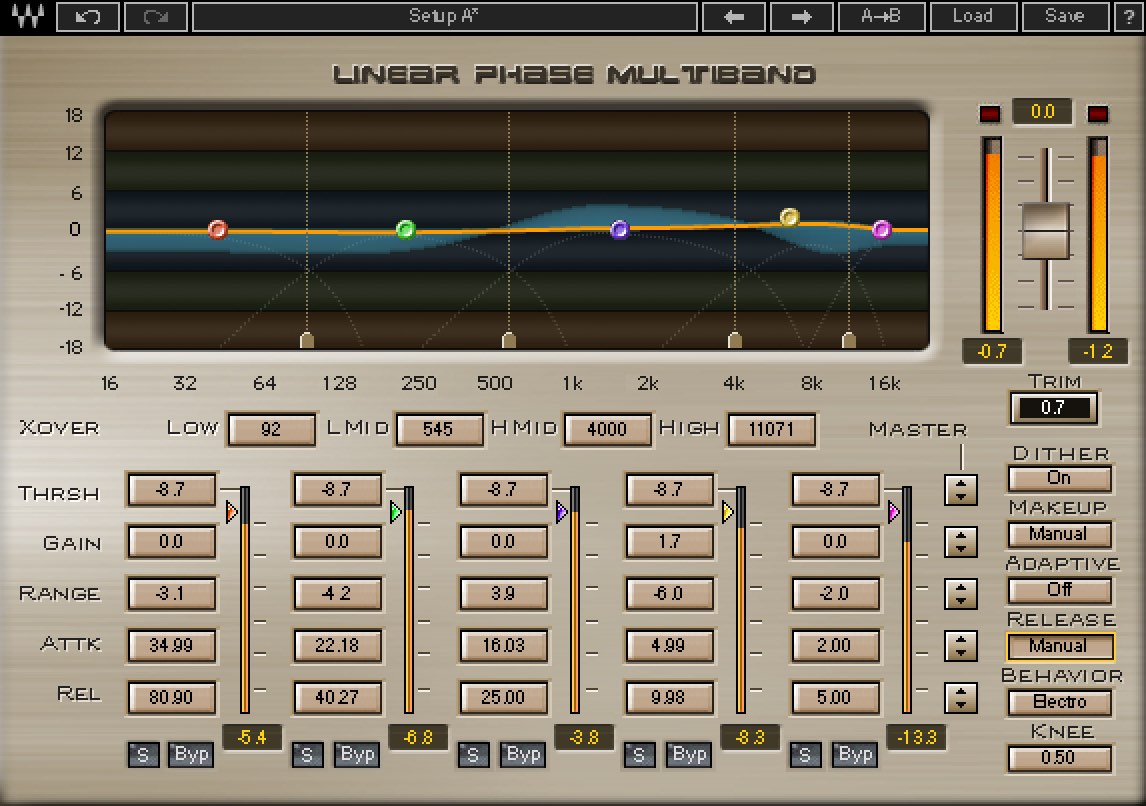
The Linear Phase Multiband Compressor is very well tuned for mastering purposes. It has great controls. It sounds clean and does what you expect it to, with minimal fuss.
Waves Linear Phase Multiband Compressor Tips
- Linear phase technology is great for preserving punch in your music. A transient contains lots of different frequencies happening at the same time. A typical non-linear filter can shift each of these frequencies differently in time, therefore smearing the transients. This plugin doesn’t do that.
- I also like to use this plugin as a transient recovery tool (sadly a lot of premasters I get are squashed lifeless). This can be achieved by setting a positive range value in the desired bands. If you need lots of snap, go for a short attack time.
- The LinMB utilizes several specialized techniques to achieve great fidelity. The manual is superb and explains everything in a very educational way. Make sure to read it (and yes, it’s long)!
- The plugin introduces about 70ms of latency. This is due to the intensive calculations the plugin performs. This should not be a problem in mastering work. But you should be aware of this if you ever decided to use the plugin in a production setting.
Link: Waves Linear Phase Multiband Compressor
Waves RS56 Passive EQ
The Waves RS56 Passive EQ is a faithful model of the classic EQ used at the Abbey Road studios since the ’50s. It was originally only used for mastering (although this was before the term mastering was invented). It eventually found it’s way into studio recordings as well.
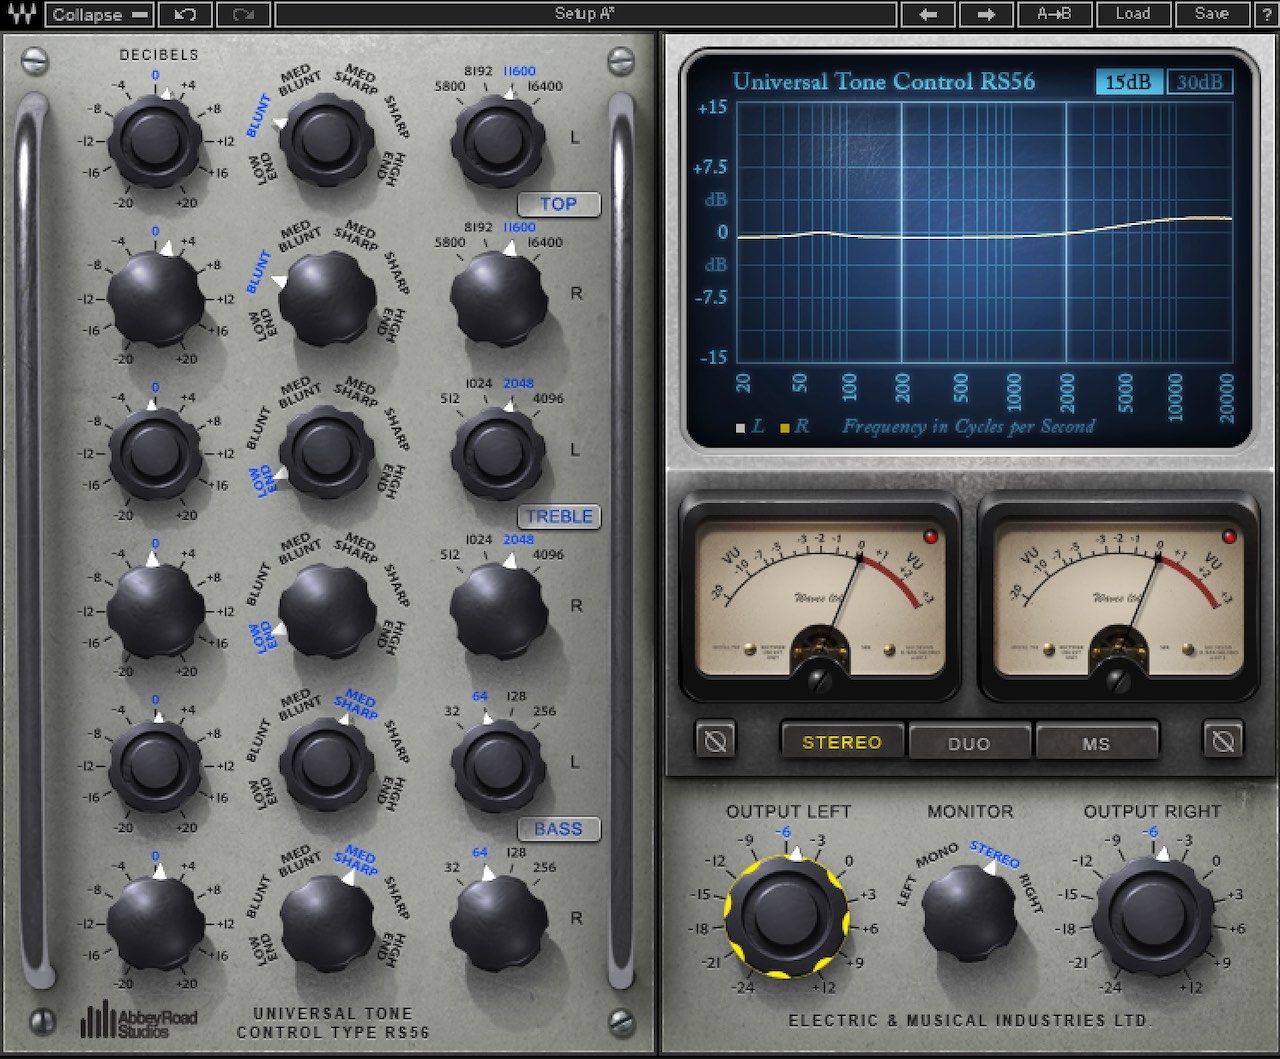
As a passive EQ, the RS56 is quite gentle and forgiving. It’s ideal for subtle tone shaping in mastering situations. The stepped frequency and Q controls are also nice for mastering. Having fewer (but enough) choices is better for mastering workflow.
Waves RS56 Passive EQ Tips
- The MS mode is fantastic for mastering. It gives you tons of control over the stereo image and punch.
- You can switch the EQ bands to bypass by clicking the labels “Top”, “Treble” and “Bass”.
- The monitor section includes a setting for checking your mix/master in mono. Use it!
Link: Waves RS56 Passive EQ
Waves S1 Stereo Imager
The S1 Stereo Imager is, of course, a classic of the classics. And it is just as relevant today as it was 15 years ago. The S1 is a toolset that allows you to enhance, readjust and fix issues in the stereo image. It relies on well recognized, non-destructive engineering principles in its design. It won’t produce unwanted side effects, which is crucial in mastering work.

Beyond simple widening or narrowing of the stereo image, S1 can, for example, fix asymmetrical mixes. You can re-balance the left and right components without affecting the position of the center image. Alternatively, the center image could be shifted left or right without affecting the sides.
Waves S1 Stereo Imager Tips
- Use the “Shuffle” feature to safely add dimension in the lower end of the frequency spectrum. The “Freq” control defines the frequency below which the effect is applied. Shuffle is fully phase compensated so it won’t cause problems with mono compatibility.
- Using Shuffle can cause the mix to lose some perceived weight because the low-end frequencies are being distributed over a wider area. Not to worry! The “Bass trim” control is included to compensate for that, and it works great.
Link: Waves S1 Stereo Imager
Waves SSL G-Master Buss Compressor
I’ll be the first to admit there is a lot of good competition out there in the category of SSL style bus compressors. The Waves SSL G-Master Buss Compressor is quite old also (if I am not mistaken, the SSL series were the first analog emulations from Waves). But you know what! At the end of the day, there is nothing wrong with this plugin. It still sounds good and can often be had for a great price. It’s a solid workhorse that can do good things on your master bus.
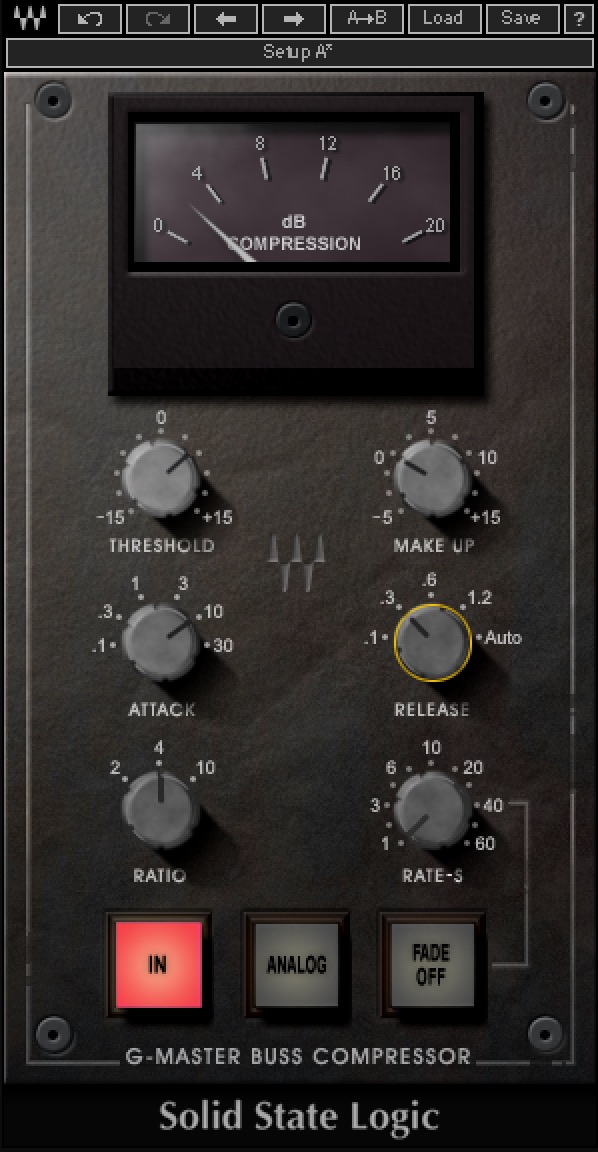
It’s a great tool to use for subtle pumping movement or glue compression. Besides the master bus, it can also work great on drums. If you don’t have a compressor like this yet and can grab this for a good price, the Waves SSL G-Master Buss Compressor is a good asset to have in your arsenal.
Waves SSL G-Master Buss Compressor Tips
- Be mindful of the transients. You don’t want to kill them. Attack settings of 10 or 30ms are the safest.
- Adjust the release time so that the compression moves nicely in sync with your material, creating movement or glue.
- For a more aggressive sound, bring down the attack and use a faster release time.
Link: Waves SSL G-Master Buss Compressor
Waves Submarine
If you have a mix that is lacking sub-bass and going back to the session to fix it isn’t an option, Waves Submarine will certainly help you resolve the situation.

Submarine is a subharmonic generator. You tell it what frequencies to track by using the “Range” control. It then intelligently generates sub-bass content one and two octaves below this target material. It has further controls for drive, dynamics, wet/dry mix, and output volume. Very simple, and very effective.
I own and have used many plugins that do a similar thing. What makes this one special? Two things: 1) The sound, and 2) The precision by which it tracks the target material. Submarine sounds super solid. It can give you that intense floor-shaking good quality sub-bass you always wanted but never quite knew how to get. I know that’s a lot to promise. Try the demo and you’ll see what I mean.
Waves Submarine Tips
- Use the “Drive” control to add some upper harmonics to the generated sub-bass to glue it better to your mix.
- Use the “Dynamics” to compress the generated sub-bass. With this, you can make it less thumpy and more even sounding if you wish.
- The “Mono sub” option generally produces a stronger sub sensation as it will make all loudspeaker cones move in sync.
- The sub-bass this plugin generates can go so low that you might not be able to hear it on your system. Yet it’s there and it could be very loud. Be careful and use a spectrum analyzer to verify what is going on.
Link: Waves Submarine
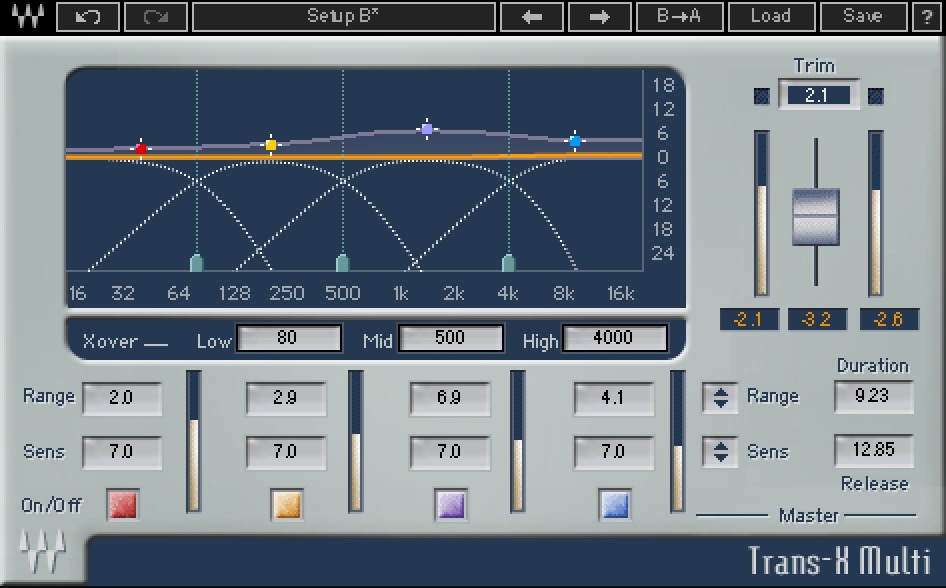
Waves Trans-X
While this plugin is not primarily designed for mastering purposes, I still find myself drawing for it sometimes. And when I’m doing production or mixing work, the Waves Trans-X is one of the most used plugins in my entire plugin arsenal. That’s how highly I think of this little gem!
I am a heavy user of transient shaping plugins. I own a whole bunch of them. They all tend to work a little bit differently. Thus where one plugin excels on one type of material, another performs better with something else.
Many times I end up trying a few different plugins and then choosing the one that works the best in the given situation. More often than not though, I end up with Trans-X. Quite often I already know from the material that Trans-X will work best. Generally, I find it works the best when I need to get something sounding super snappy and punchy.
While many dynamics processors detect when the level goes over a certain reference level, the Trans-X detects when gain rises faster than a certain velocity reference. This means the signal can be low at times and higher at other times, and the transients will still be detected and re-shaped consistently.
Trans-X is a great example of an old plugin that has stood the test of time perfectly. It comes in two versions: wideband (single band) and multi-band. They are both great.
Waves Trans-X Tips
- Try the “Pensado 808” preset on something that sounds flat, and be amazed.
- It’s easy to do much with this plugin. You can lose the natural body of the material so be careful.
- I like to start with a high range setting. This allows me to hear better how the plugin is reacting to the transients in the particular material. After adjusting everything else, I then drop the range back down to an appropriate level.
Link: Waves Trans-X
Vitamin Sonic Enhancer
Sometimes there is a need to reach for some color and mojo. The Waves Vitamin Sonic Enhancer is designed for this purpose. It’s a multi-band harmonic enhancer that also can add some subtle punch and work with the stereo image.
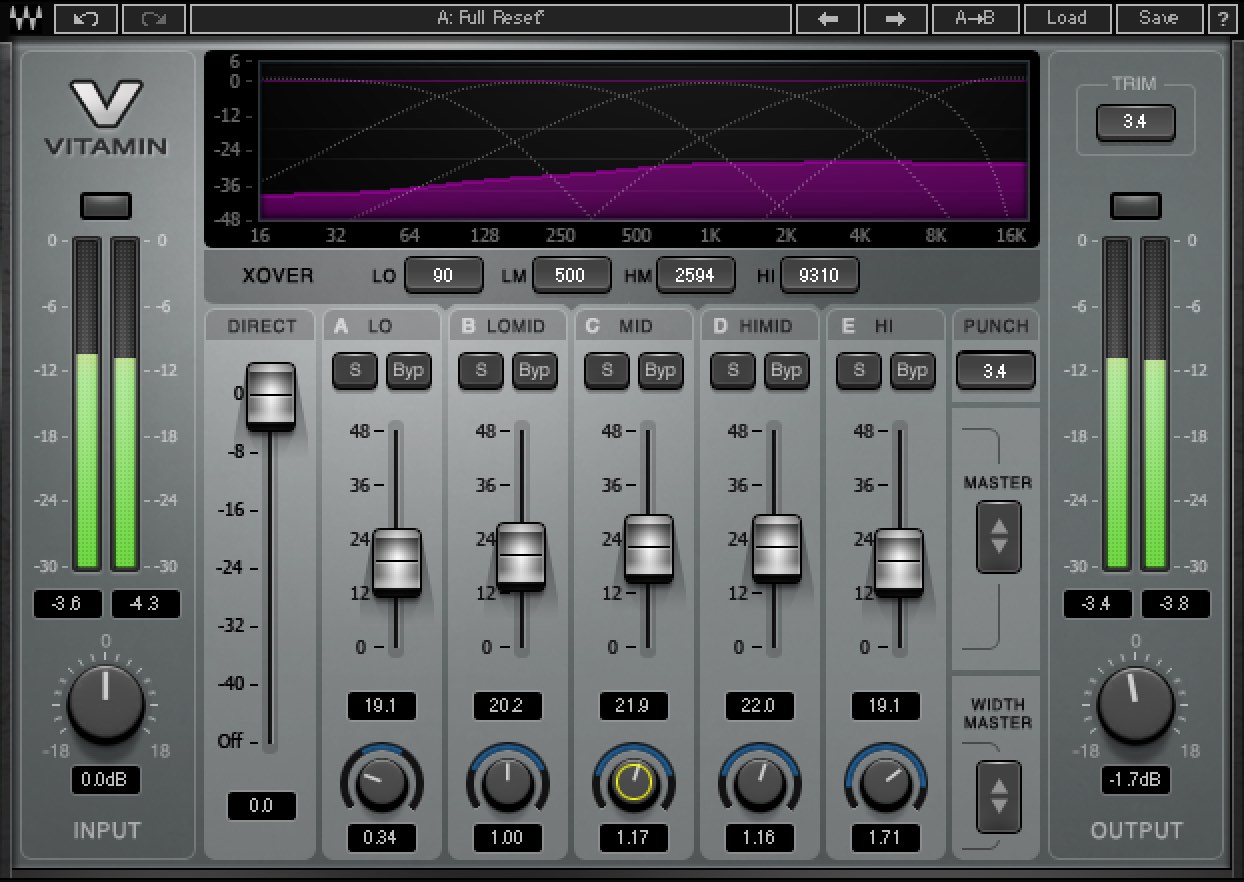
I’ve always liked the sound of Vitamin. It’s silky smooth with just a hint of underlying aggression and edge lurking in there. I like the way the controls are designed and presented. Vitamin is a joy to work with.
Waves Vitamin Sonic Enhancer Tips
- If you have the habit of making your low-end mono, you can do that with Vitamin. Just dial the stereo width of the “Lo” band to zero.
- You can turn down the “Direct” fader completely to hear only the processing added by Vitamin. This is very useful.
- Watch the input and output meters. Match levels using the output gain to make better judgments.
Link: Waves Vitamin Sonic Enhancer
FAQ
The following Waves plugins are great for mastering:
– Waves Abbey Road TG Mastering Chain
– Waves Abbey Road Vinyl
– Waves Center
– Waves H-Comp Hybrid Compressor
– Waves Infected Mushroom Pusher
–Waves L3-16 Multimaximizer
– Waves Linear Phase Multiband Compressor
– Waves RS56 Passive EQ
– Waves S1 Stereo Imager
– Waves SSL G-Master Buss Compressor
– Waves Submarine
– Waves Trans-X
– Waves Vitamin Sonic Enhancer
The basic types of tools in mastering include EQs, single-band and multiband compressors, stereo image processors, transient shapers and limiters.
Mastering is a very delicate process and it’s easy to ruin your music if you don’t know what you’re doing. It’s best to adopt a “less is more” approach when it comes to mastering plugins.
1. Download and install the Waves Central application from Waves.
2. Launch Waves Central and log in with your Waves account details if prompted.
3. Select “Install products” from the navigation.
4. Select “My products” to view the plugins you’ve purchased.
5. Select the plugin you wish to install and click “Install and activate”.
1. Download and install the Waves Central application from Waves.
2. Launch Waves Central and log in with your Waves account details if prompted.
3. Select “Settings” from the navigation.
4. Go to “Maintenance”. You’ll find the uninstall options there.
Best Waves Plugins for Mastering in 2022 – Your Thoughts?
What do you think? Any further questions about these plugins? Let me know in the comments section and I’ll get back to you. For further reading, you may also want to check my broader post about best Waves plugins: The Best Waves Plugins in 2019.
Leave a Reply to Ilpo Kärkkäinen Cancel reply